How to setup SSH access with your NameCheap Hosting
I got my hosting and domain as a bundle from NameCheap because, as the name implies, it was cheap. And easy. When you go with the cheapest option for hosting what you get is not your own private server. What’s nice about NameCheap is that they still give you SSH access. You can’t do the things you would normally do on a VPS like install software over SSH. But you can syncronize your site with handy tools lik rsync instead of uploading everything over FTP.
However the knowledge base articles on how to set this up aren’t great. If you’re like me you ran into trouble because the knowledge base article is lacking information and the NameCheap support team just seems to be reading off of those same articles.
I’m writing this mostly for myself because I know I will forget this, and if I ever need to add another key in the future, this will save me from repeated the same frustration. But just in case you are someone struggling to setup SSH with your namecheap hosting, I’ll walk you through how I got it working. This process assumes you’re working from a Linux based or other Unix-like operating system. If you’re running on Windows, the first step is to replace your spyware OS with something better.
About the first half of this is just repeating what Namecheap has already covered in it’s knowledge base. If you’ve already generated some keypairs and edited your SSH config file in your failed attempts to connect, delete them all now, we’ll start from scratch.
Gather info⌗
Log into the the cPanel application provided with your hosting.
On cPanel’s main page, there should be a section called General Information, at the bottom of which is a link: server information. Click it. Copy the server name and the shared IP address.
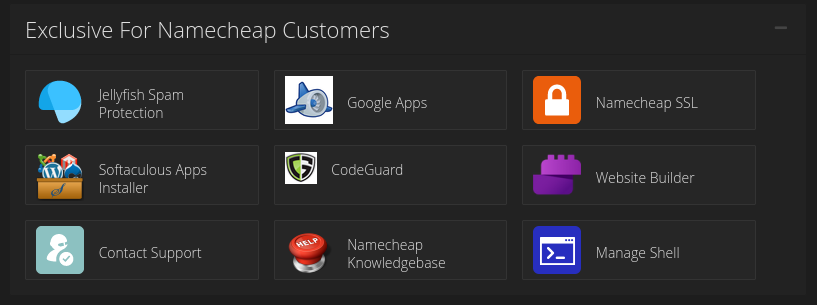
Go back to the main cPanel page and find the Manage Shell button under the section exclusive for namecheap customers, and click on it. There is a tabled called access details. Copy the username, and ssh port. The Server IP should be the same as the shared IP we just gathered.
Enable SSH⌗
Flip the switch that says enable SSH access. This will start the SSH daemon on your server. Then click generate a new key.

Generate a new key pair⌗
Change the default Key Name to something else. Something that will let you know what this key is for, like “namecheap_is_ok”. Set a password with the password generator and make a note of both of these, you will need them later. For key type and key size the defaults are fine. Click Generate Key to finish.

The next page you see will have some terminal output. The only thing we’re interested in here is the line: Your public key has been saved in /home/denntxuc/.ssh/namecheap_is_ok.pub. That public key is what we need to download to our local computer. Let’s go get it. Click go back, which will bring you to the Manage SSH Keys part of cPanel.
On this page you should see two lists - one for public keys and one for private keys. Find the name of the public key you just created and click manage. The next page will tell you the key is not authorized. No shit. Click Authorize. Now this public/private key pair is allowed to access this server.
Back to the SSH key management page, find the private key with the name you picked and click View/Download then Download Key. We are now done with the stuff that needs to be done in cPanel.
Local SSH setup⌗
Open up your file manager and move the key file you just downloaded to ~/.ssh. That is a hidden directory in your home folder named .ssh. Now that you’re in ~/.ssh, find the file named config. If it doesn’t exist, create it and open it with a text editor.
Add the following text:
host yourdomain.net
    hostname <server IP>
    port 21098
    user <username>
    IdentityFile ~/.ssh/<key name>
    HostKeyAlgorithms +ssh-rsa
    PubkeyAcceptedKeyTypes +ssh-rsa
Replace <server IP>, <username>, <key name> with the relevant information gather earlier. Save and close the file when you’re done.
Now right-click the key file, select properties, and go to the permissions tab. The owner (you) is the only one who should have read/write access to this file. Set access for “group” and “others” to None, or uncheck all the boxes for them, which ever way your file manager does it. Close this window when you’re done.
Make the connection⌗
Now we should be ready to connect. Fire up a terminal and enter:
ssh yourdomain.net
Since this is your first time connecting, it will confirm that you want to connect. Say yes.
It seems like Namecheap has configured their SSH service to fall back on using the root password (same as your cPanel password) if the key pair fails. So pay attention to what happens next. If you get some error message and/or it asks for username@ip-address’s password, then something went wrong with your key pair setup. Delte the file, delete the key from your cPanel and try again, you did something wrong.
Otherwise, if everything was done correctly, the server should prompt you for the passphrase for they key you generated. What you should enter here is the “password” you generated on cPanel at the time you generated the key. The terms are mixed up, which is not helpful.
[denny@Ryzen .ssh]$ ssh dennischaves.xyz
Enter passphrase for key '/home/denny/.ssh/namecheap':
[denntxuc@server282 ~]$
If all is well, the prompt should change to [username@serverNumber ~]$, and you are now connected to your web host via SSH! Congratulations!
Now, you can’t do everything you could do on a VPS, like install applications, but you can now use nifty tools like rsync to synchonize your local website files with those on your host!
Thanks for reading, hope it worked out for you!
Bonus: rsync⌗
If you’re still connected to the remove server, type logout to disconnect. The following command will synchronize your local website directory with your server.
rsync -rtvzP /path/to/local/website/dir/ username@yourdomain.net:public_html/
Note: Make sure you leave the trailing / on the end of the paths. rsync is picky about this. In the example above, the trailing slashes tell rsync to “copy the contents of dir into the directory public_html.” Not included the trailing slash is equivalent to saying “take dir and its contents and copy them to public_html.” This will create a new directory within public_html called dir and all your files will be uploaded there. That’s not what you want!
rsync further explained⌗
rsync is usually used with a group of options that set the stage. Here’s what the options used above do:
| option | action |
|---|---|
r |
recursive: all subdirectories and thier files will be synced |
t |
Preserves modification times of your files. |
v |
verbose: allows you to see what is being uploaded/synced |
z |
zip: files are compressed for transfer and uncompressed on the other end. |
P |
See the progress of the upload/sync. If the upload is interrupted, this option enables you to resume it later. |
There is another great option that I didn’t use in my example because it is a little dangerous: -d or --delete. This option will delete extraneous files on the destination end that are not on the source end. So, for example, if I delete a few blog post pages from my local copy of my website, those pages will also be deleted from the host/server. Without this option, the extra files would simply remain on the server. I say this is dangerous because if you slip up on the trailing /’s like I mentioned above, you could wind up uploading your website to the wrong directory and deleting everything else that was in there! So be careful with the -d option! If you use it, you should combine it with -n AKA --dry-run. Dry run mode will show you the output as if the upload/sync happened, but no files are moved, copied, or deleted. You can then look at this output to make sure everything is working the way you want it to, then remove the option and run the command again to actually carry it out.